
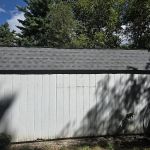
- What Are Roof Valleys and Why Are They Important?
- How to Identify Leaks in Roof Valleys
- Step-by-Step Guide to Sealing Roof Valleys
- Common Mistakes to Avoid When Sealing Roof Valleys
- When to Call a Professional for Roof Valley Repairs
What Are Roof Valleys and Why Are They Important?
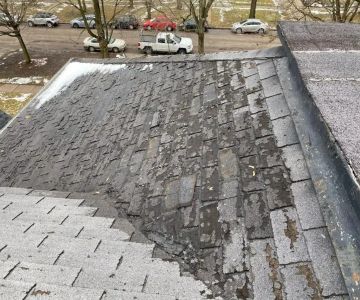
Roof valleys are the areas where two roof slopes meet, forming a V-shaped channel. These valleys are crucial for directing water away from the roof and into the gutters. They play an essential role in ensuring that rainwater is effectively channeled off the roof without causing damage to the structure.
However, roof valleys are also vulnerable to leaks, especially if not properly sealed or maintained. Water tends to collect in valleys more than on other parts of the roof, making them a common source of leaks and water damage. Proper sealing of the valleys is critical to preventing these issues, protecting your home from potential water damage, and extending the lifespan of your roof.
How to Identify Leaks in Roof Valleys
Identifying leaks in roof valleys is essential for preventing water damage to your home. Here are some common signs that your roof valley may be leaking:

McManus Kitchen and Bath Remodeling
1241 W Tharpe St Suite 8, Tallahassee, FL 32303, USA
1. Stains on the Ceiling or Walls
Water stains or discoloration on the ceiling or walls directly beneath the roof valley are a clear sign of a leak. These stains may appear as brownish or yellowish patches and are often a result of water infiltration through the roof valley.
2. Damp or Wet Insulation
If you notice damp or wet insulation in the attic, particularly around the area where the roof valley is located, this could indicate that water is leaking through the valley and into the attic space.
3. Visible Damage to the Shingles or Flashing
Inspect the shingles or flashing around the roof valley. If you notice any damage, such as cracked or missing shingles, or if the flashing appears loose or worn out, these issues can allow water to seep into the valley and cause a leak.
4. Pooling Water in the Valley
After a rainfall, check the roof valley for any standing water. If water pools in the valley and doesn't drain properly, it could lead to leaks or deterioration of the roof materials over time.
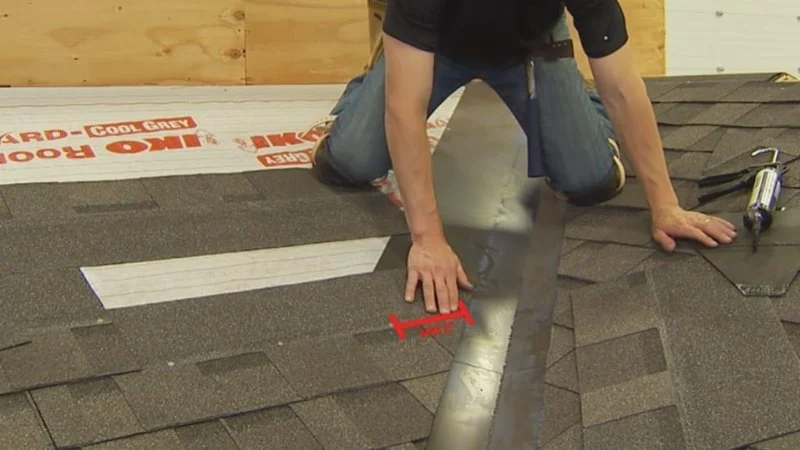
Step-by-Step Guide to Sealing Roof Valleys
Sealing roof valleys is a straightforward process, but it requires careful attention to detail to ensure a proper seal. Follow these steps for effective roof valley sealing:
1. Inspect the Valley and Clean the Area
Start by inspecting the roof valley for any damage, such as cracked flashing, missing shingles, or debris buildup. Clean the valley thoroughly, removing leaves, dirt, and any other obstructions that could affect the seal. It's important to ensure that the valley is free from debris to achieve the best possible seal.
2. Repair Any Damage
If you find any damage to the shingles or flashing in the valley, repair it before proceeding with sealing. For example, replace any missing or damaged shingles and reattach or replace damaged flashing. This will help ensure that the new seal holds up over time.
3. Apply a High-Quality Roofing Cement or Sealant
Once the area is clean and repaired, apply a generous amount of roofing cement or sealant along the edges of the valley. Use a trowel or caulking gun to spread the cement evenly, ensuring that it covers all seams and gaps where water might enter. Make sure the product is designed for use with the type of material your roof is made from, whether it's asphalt shingles, metal, or another material.
4. Install New Flashing (if needed)
If the existing flashing is damaged or insufficient, install new flashing along the valley. Overlap the flashing to create a watertight seal, and secure it with nails or screws, making sure it is tightly fastened to the roof.
5. Replace Shingles (if necessary)
If the shingles around the valley are damaged or missing, replace them after applying the sealant. Lay new shingles in a way that overlaps the flashing, ensuring that water flows smoothly into the valley rather than underneath the shingles.
6. Allow Time to Cure
Once you've applied the sealant and completed any necessary repairs, allow the area to cure for the recommended time specified by the manufacturer. This ensures the sealant bonds properly and provides long-lasting protection.
Common Mistakes to Avoid When Sealing Roof Valleys
While sealing roof valleys is relatively simple, there are a few common mistakes that can lead to problems later on. Here’s what to avoid:
1. Using the Wrong Sealant
Not all roofing sealants are created equal. Be sure to choose a sealant that is specifically designed for your roof material (asphalt shingles, metal, etc.). Using the wrong sealant can result in poor adhesion or premature failure of the seal.
2. Skipping the Inspection
Skipping the inspection step can lead to missed damage, such as cracks in the flashing or missing shingles. Make sure to thoroughly check the valley and surrounding areas for any issues before applying sealant.
3. Inadequate Cleaning
Cleaning the roof valley is an essential step before applying sealant. If debris is left in the valley, it can interfere with the adhesion of the sealant and cause leaks in the future. Always ensure the area is completely clean before sealing.
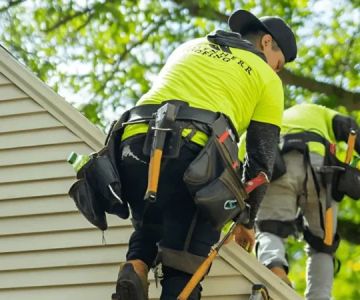
When to Call a Professional for Roof Valley Repairs
While sealing roof valleys can be a DIY project, some situations may require professional intervention. Here are a few cases where it’s best to call a roofing expert:
1. Extensive Damage
If the damage to the roof valley is extensive and includes structural issues, it’s best to call a professional. A roofer can assess the damage and provide a more comprehensive repair solution to avoid further issues.
2. Inexperienced with Roofing
If you're not comfortable working on your roof or lack the necessary tools, it’s safer to hire a professional. Roofing can be dangerous, especially on steep slopes, and a professional will have the proper training and equipment to handle the job safely.
3. Ongoing Leaks
If you've sealed the valley but continue to experience leaks, it may be due to underlying issues that need professional attention. A roofing expert can inspect the problem and identify any additional repairs that are needed.
Properly sealing roof valleys is crucial for protecting your home from leaks and water damage. By following the right steps and avoiding common mistakes, you can ensure your roof remains watertight and durable. If you're unsure about handling this yourself, consider consulting with a professional to get the job done correctly.
For roofing supplies, expert advice, and assistance with roof repairs, visit Total Roofing Hub for everything you need to maintain a safe and secure roof.
 Garpelli Home Improvement5.0 (31 reviews)
 GA Premium Roofing Inc4.0 (165 reviews)
 Ultimate Home Remodelers4.0 (33 reviews)
 757 Exteriors Roofing and Siding5.0 (65 reviews)
 Malone Roofing4.0 (6 reviews)
 Chittenden Builders4.0 (38 reviews)
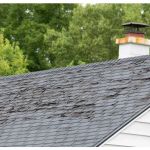 Top 10 Signs Your Roof Needs Immediate Repair: Protect Your Home
 The Environmental Benefits of a Cool Roof: Saving Energy and the Planet
 Siding Maintenance for Rental Properties: Responsibilities & Costs
 The Environmental Benefits of a Cool Roof: Why You Should Consider Installing One
 How to Choose a Reliable Roofing Contractor Near You: A Step-by-Step Guide
 Should I Repair or Replace My Roof? A Complete Guide