
1. Introduction to Flashing Installation in Siding Projects
Flashing installation is an essential component of any siding project. Proper flashing prevents water from seeping into walls and foundations, which can lead to significant damage. In this article, we’ll walk you through the importance of flashing, the best practices for installation, and tips for ensuring a successful siding project. Whether you’re a DIY enthusiast or a professional contractor, understanding flashing installation is key to delivering high-quality results.
- The Importance of Flashing in Siding
- Types of Flashing Used in Siding
- Best Practices for Flashing Installation
- Common Flashing Installation Mistakes
- Tools and Materials Needed for Flashing Installation
2. The Importance of Flashing in Siding
Flashing plays a critical role in preventing water from entering the gaps and seams of your siding. Without proper flashing, moisture can accumulate behind the siding, leading to mold growth, wood rot, and structural damage. Flashing directs water away from vulnerable areas, such as joints, windows, and doors, helping to maintain the integrity of the structure. Ensuring proper flashing installation is crucial for the longevity of your siding and the safety of your home.

2.1 Protecting the Structure
Flashing helps protect both the exterior and interior of your home from water damage. By guiding water away from key areas like windows and roof joints, it reduces the risk of leaks and extensive damage to the underlying materials. This is especially important in areas that are frequently exposed to heavy rain or snow.

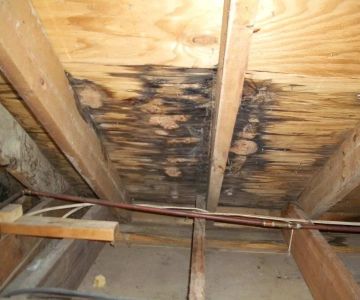
2.2 Preventing Water Damage
Proper flashing installation prevents water from seeping into areas where it could cause rot, corrosion, or even structural weakening. Without flashing, the buildup of moisture can lead to mold, mildew, and other moisture-related issues that can degrade the performance of your siding over time.
3. Types of Flashing Used in Siding
There are several types of flashing materials and techniques used during siding installation, each with its specific use. Selecting the appropriate type of flashing is essential for ensuring effective water management and a successful siding project.
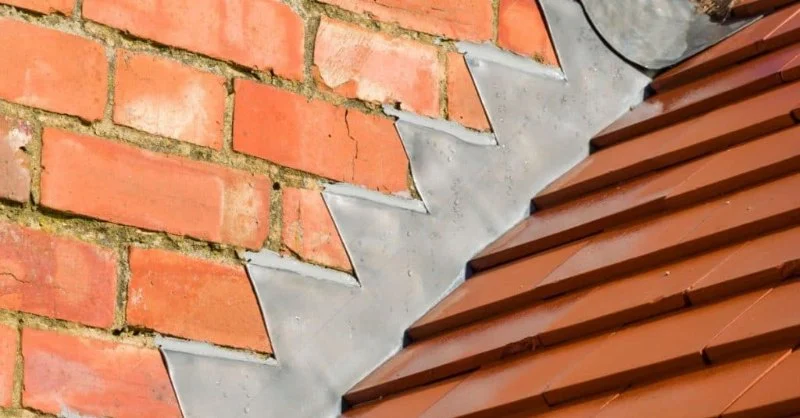
3.1 Metal Flashing
Metal flashing is one of the most common types of flashing used in siding projects. Typically made of aluminum, copper, or galvanized steel, metal flashing is durable and resistant to water. It’s often used around windows, doors, and roof intersections, providing a reliable barrier against water infiltration.
3.2 Peel-and-Stick Flashing
Peel-and-stick flashing is a popular choice for areas that need a quick, easy, and durable solution. It adheres directly to the substrate, forming a watertight seal that protects against leaks. This type of flashing is ideal for applications where traditional flashing might be difficult to install or maintain.
3.3 Flashing Tape
Flashing tape is a self-adhesive material that’s used in conjunction with other flashing types to create an airtight seal. This tape can be applied to joints and seams to enhance waterproofing and prevent leaks. It’s commonly used in combination with peel-and-stick flashing for additional protection.
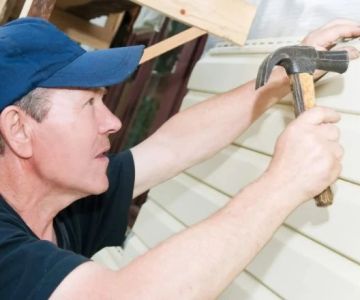
4. Best Practices for Flashing Installation
Installing flashing correctly is essential to prevent water intrusion and ensure the durability of your siding. Here are some key tips to keep in mind during the installation process:
4.1 Ensure Proper Overlapping
One of the most important aspects of flashing installation is ensuring that the flashing overlaps properly. Flashing should always overlap the layer beneath it to direct water away from the wall. Properly overlapping each piece of flashing ensures that water cannot flow underneath and cause damage.
4.2 Use Flashing Around Windows and Doors
Windows and doors are common entry points for water, so it’s crucial to install flashing around these areas. Flashing should be placed in a way that guides water away from the seams and ensures a tight seal between the window or door and the siding.
4.3 Seal All Seams and Joints
Seams and joints are weak points in the siding system where water can easily infiltrate. Be sure to seal all seams and joints with flashing, and use a quality sealant to prevent any water from entering the gaps.
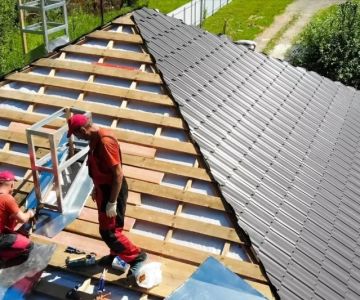
4.4 Check for Proper Drainage
After installing the flashing, check to ensure that there is proper drainage. Water should flow away from the structure, not towards it. This can be achieved by angling the flashing slightly to ensure that it directs water off the surface and away from the building.
5. Common Flashing Installation Mistakes
Even experienced contractors can make mistakes when installing flashing. Avoid these common errors to ensure a long-lasting and watertight siding installation:
5.1 Improper Flashing Overlaps
One of the most common mistakes is failing to properly overlap the flashing. If the flashing isn’t overlapped correctly, water can easily seep underneath and cause damage. Always ensure that the flashing pieces overlap by at least 2 inches to create a secure barrier.
5.2 Skipping Flashing at Key Locations
Some installers might overlook areas that require flashing, such as roof-to-wall joints, window edges, and door frames. These are critical areas where water infiltration can cause significant damage, so it’s important not to skip any flashing installations.
5.3 Using Inappropriate Flashing Materials
Choosing the wrong type of flashing material for a specific area can result in ineffective protection. Be sure to use materials that are suited to your specific climate and the parts of the structure you're working on. For instance, metal flashing is ideal for long-term durability, while peel-and-stick flashing is perfect for difficult-to-reach areas.
6. Tools and Materials Needed for Flashing Installation
To ensure proper flashing installation, having the right tools and materials is essential. Below is a list of items you'll need for a successful flashing installation:
6.1 Tools
Some basic tools required for flashing installation include a utility knife, measuring tape, hammer, caulking gun, and roofing nails. You may also need a pair of tin snips for cutting metal flashing and a chalk line to ensure straight cuts and proper alignment.
6.2 Materials
The materials you’ll need include the flashing itself (metal, peel-and-stick, or flashing tape), quality sealant or caulk, nails or staples for securing the flashing, and weather-resistant tape. Always ensure that your materials are of high quality to prevent future issues.


 Allesson Roofing & Siding5.0 (7 reviews)
 Valdez Family Roofing Company4.0 (53 reviews)
 Mountain Peak Roofing LLC4.0 (89 reviews)
 Quad City Windows & Doors4.0 (28 reviews)
 TSW Roofing Solutions Inc4.0 (104 reviews)
 Robin's Roofing5.0 (42 reviews)
 Siding Repair After Weather-Related Discoloration: Restoring Your Home’s Exterior
 What Government Rebates Exist for Roofing & Siding Upgrades
 Roof Repair Tools for Homeowners: What’s Worth Buying for DIY Repairs
 Siding Upgrade Ideas That Don’t Break the Bank
 What to Expect During a Roof Inspection: A Comprehensive Guide
 How to Choose a Reliable Roofing Contractor Near You