
1. Roof Ridge Cap Installation: Best Techniques for a Secure and Durable Roof
Roof ridge caps are a crucial part of any roofing system, playing an essential role in sealing the top edges of the roof, ensuring water doesn’t penetrate, and improving the overall appearance of the roof. A properly installed ridge cap enhances the roof's durability and lifespan. In this article, we’ll dive into the best techniques for roof ridge cap installation, providing tips on how to get the job done securely and effectively, whether you’re working on a DIY project or hiring professionals.
PDR General Contracting
EastonBristol CountyMassachusetts
580 Washington St, South Easton, MA 02375, USA
2. Why Roof Ridge Caps Are Important
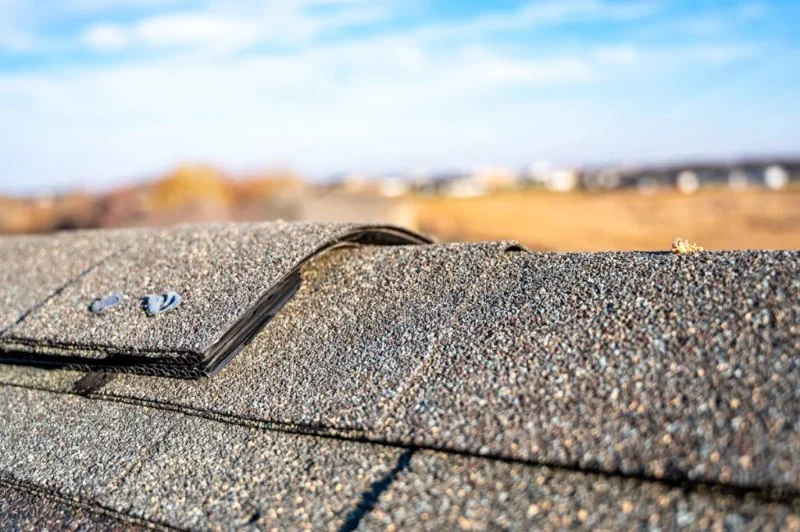
The ridge cap serves as the final component to protect the roof’s ridges, which are the top edges of the roof where two sloping planes meet. These caps are typically installed over the roof's ridge boards and can be made of various materials, such as asphalt, metal, or even wood, depending on the roofing material and style of your home.
Proper installation of ridge caps is critical because they prevent water from infiltrating the roof at the peak, which can lead to leaks, mold, and other structural damage. Additionally, a well-secured ridge cap offers better protection against high winds, ensuring that the roof remains intact during storms or extreme weather conditions.
EMPIRE HOME IMPROVEMENT SERVICE LLC
Port ChesterWestchester CountyNew York
48 Clinton St, Port Chester, NY 10573, USA
3. 1. Selecting the Right Material for Ridge Cap Installation
The first step in installing a ridge cap is selecting the right material. This decision will largely depend on the type of roofing you have. Here are the most common materials used for ridge cap installation:
- Asphalt Shingles: Asphalt shingles are the most common material for residential roofs. They are affordable, easy to install, and work well with many types of roofing. Asphalt ridge caps are typically installed using overlapping shingles to ensure waterproofing.
- Metal Ridge Caps: For metal roofs, metal ridge caps provide a sleek, durable, and waterproof finish. Metal ridge caps are typically pre-formed to fit specific roof profiles and can be installed using screws or clips to secure them in place.
- Wooden Ridge Caps: If you have a wooden or cedar shake roof, wooden ridge caps are an attractive option. These caps are typically made from the same wood material as the roof and can blend seamlessly with the natural look of the roof. However, they require more maintenance than asphalt or metal caps.
Make sure to choose a material that is compatible with your roof type and climate conditions to ensure the longevity and effectiveness of the ridge cap.
4. 2. Step-by-Step Guide to Installing Roof Ridge Caps
Now that you’ve selected the appropriate material, it’s time to move forward with the installation. Below is a step-by-step guide to help you install a roof ridge cap securely and effectively:
5. 1. Prepare the Roof Ridge
The first step is to make sure the roof ridge is clean and free of debris. Remove any loose shingles, nails, or dirt that may be present. This will ensure that the ridge cap adheres properly and will prevent any gaps or holes that could lead to leaks.
6. 2. Lay Down an Underlayment
Before installing the ridge cap, it’s essential to lay down a layer of underlayment along the ridge. This underlayment provides an extra layer of protection against water penetration and helps to secure the ridge cap more firmly. The underlayment should be overlapped along the ridge to create a continuous water barrier.
7. 3. Position the Ridge Caps
Once the underlayment is in place, position the ridge caps along the roof’s ridgeline. Start at one end of the roof and carefully align the first piece of the ridge cap, ensuring that it fits snugly along the ridge. For asphalt shingles, you will overlap the shingles over the ridge, while for metal ridge caps, you will install them according to the manufacturer’s specifications.
8. 4. Secure the Ridge Caps
After positioning the ridge caps, secure them in place using roofing nails or screws. Make sure to fasten them tightly but not too forcefully, as this could damage the material. Ensure that each piece overlaps the previous one by a few inches to maintain the waterproof barrier and provide added security.
9. 5. Inspect and Seal
After installing the ridge caps, inspect the entire ridgeline for any gaps or areas where the caps are not securely fastened. If necessary, use roofing cement or a sealant to seal the edges and prevent water from seeping through. Make sure that the ridge cap is flush against the roof and there are no visible openings.
10. 3. Common Errors to Avoid During Ridge Cap Installation
Even experienced roofers can make mistakes during ridge cap installation. Here are some common errors to avoid:
- Inadequate Overlap: Failing to overlap the ridge caps adequately can lead to gaps, which may result in water leaks. Always ensure that each piece overlaps the previous one by at least 2-3 inches.
- Incorrect Fastening: Over-tightening or under-tightening the ridge caps can cause problems. Too tight and you risk cracking the material; too loose and the caps may not stay in place, leading to water penetration.
- Skipping the Underlayment: The underlayment is essential for additional waterproofing. Skipping this step can lead to moisture problems down the line.
11. 4. Case Study: Roof Ridge Cap Installation Challenges
Consider a recent roof installation project in San Francisco, where the roofers faced high winds and unpredictable weather. Due to the steep pitch of the roof, securing the ridge cap was more difficult than anticipated. However, by using the right materials and following proper installation techniques, they were able to ensure the ridge caps stayed in place, even during the stormy conditions. This case study highlights the importance of choosing the right material for your roof’s specific pitch and environment.
12. 5. Using Total Roofing Hub for Expert Roof Installation
If you’re planning to install or replace your roof, contact Total Roofing Hub for professional assistance. Our experienced roofers can help you select the best materials, design the right pitch, and install your roof ridge cap securely for long-lasting protection. Visit our website today to get started on your roofing project and ensure a secure, durable roof.

 Marc Joseph remodeling5.0 (1 reviews)
 PRS Roofing Inc5.0 (9 reviews)
 KAPS CONSTRUCTION4.0 (5 reviews)
 Marshall Exteriors, LLC4.0 (213 reviews)
 S.W.A.T. Roofing & Consulting4.0 (46 reviews)
 MATFI RENOVATIONS LLC5.0 (23 reviews)
 Siding Material Fire Ratings: What’s Required & What to Choose
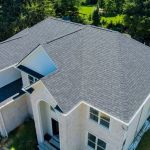 Roof Talk: Common Terminology Every Homeowner Should Know
 How Often Should You Replace Your Home's Siding? Expert Tips on Siding Longevity
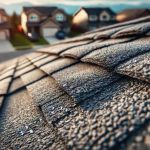 The Average Lifespan of Asphalt Shingle Roofs: How Long Do They Last?
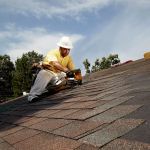 How to Choose a Reliable Roofing Contractor Near You | Top Tips and Questions
 Should I Repair or Replace My Roof? – Expert Guide for U.S. Homeowners