
- 1. Understanding Roof Flashing and Its Importance
- 2. Steps to Repair Roof Flashing Around Skylights
- 3. Repairing Roof Flashing Around Vents
- 4. Common Issues with Skylight and Vent Flashing
- 5. When to Call a Professional for Roof Flashing Repairs
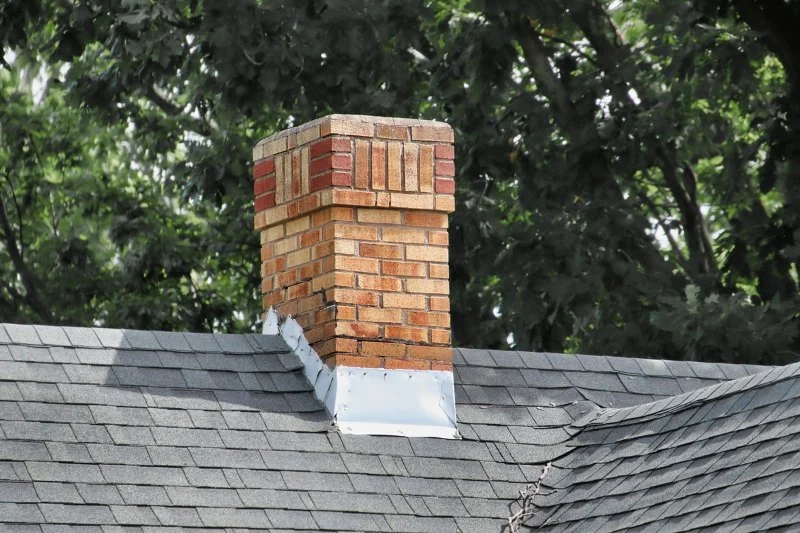
1. Understanding Roof Flashing and Its Importance
Roof flashing is a critical component of your roofing system. It is used to direct water away from areas where the roof structure meets vertical surfaces, such as skylights, vents, chimneys, and walls. Flashing ensures that water does not seep into the underlying layers of the roof, preventing leaks and water damage. Over time, flashing around skylights and vents can become damaged, leading to potential leaks. Properly repairing flashing is essential to maintain the integrity of your roof and protect your home from water damage.
Long Beach Roofing, Inc.
Signal HillLos Angeles CountyCalifornia
1920 Obispo Ave, Signal Hill, CA 90755, USA
2. Steps to Repair Roof Flashing Around Skylights
Skylights are beautiful additions to any home, but they can be a source of leaks if the flashing is not properly installed or maintained. Here are the steps to repair the flashing around skylights:
- Inspect the Flashing: Start by carefully inspecting the flashing around the skylight for signs of damage, such as rust, cracks, or gaps. Look for water stains on the ceiling below the skylight, which may indicate a leak.
- Remove the Old Flashing: If the flashing is damaged, carefully remove the old flashing using a hammer and chisel. Be cautious not to damage the surrounding roofing material.
- Clean the Area: Once the old flashing is removed, clean the area around the skylight to ensure a secure bond for the new flashing. Remove any debris, dirt, or old sealant from the roof surface.
- Install New Flashing: Apply a new layer of flashing, making sure it fits tightly around the edges of the skylight. Secure the flashing with nails or roofing screws and apply a waterproof roofing sealant to seal the edges.
- Inspect the Seals: After installing the new flashing, inspect the seals around the skylight to ensure that they are watertight. Consider using a rubberized sealant to ensure long-lasting protection.
3. Repairing Roof Flashing Around Vents
Vents are another common source of roof leaks if the flashing around them becomes damaged. Here’s how to repair roof flashing around vents:
- Inspect the Vent Flashing: Check the vent flashing for cracks, gaps, or rust. Look for signs of water damage around the vent area, both on the roof and inside the attic or ceiling.
- Remove the Damaged Flashing: If the flashing is cracked or rusted, carefully remove it. Use a crowbar or pry bar to lift the edges of the flashing without damaging the surrounding roofing material.
- Clean the Surface: Clean the area around the vent to ensure the new flashing will adhere properly. Remove any debris or old sealant to ensure a clean surface.
- Install the New Flashing: Place the new flashing over the vent and make sure it is properly fitted. Secure it in place with roofing nails or screws and apply a generous layer of sealant to prevent leaks.
- Seal the Edges: Once the flashing is in place, seal the edges with roofing caulk or sealant to ensure a watertight seal. Be sure to cover all gaps and seams thoroughly.
4. Common Issues with Skylight and Vent Flashing
While repairing flashing around skylights and vents can prevent leaks, there are a few common issues to watch for:
- Improper Installation: If the flashing was not installed correctly to begin with, it may cause water to pool around the skylight or vent, leading to leaks.
- Worn-out Sealants: Over time, the sealants around skylights and vents can degrade due to exposure to weather conditions, which can lead to leaks.
- Damaged Flashing Materials: Flashing made of metal, such as aluminum or copper, can corrode or rust over time, especially in areas with heavy rainfall or snow. Plastic flashing can also become brittle and crack under UV exposure.
- Improper Maintenance: Failure to inspect and maintain flashing regularly can lead to undetected leaks, which may cause significant water damage to the interior of the home.
5. When to Call a Professional for Roof Flashing Repairs
While some homeowners may be able to repair roof flashing themselves, it’s important to recognize when it’s time to call in a professional. If the damage is extensive or the flashing repair involves working with difficult-to-reach areas, such as steep roofs or multiple skylights, it’s best to hire a professional roofer. A professional can ensure that the job is done properly and safely, preventing further damage to your roof and home.
If you’re looking for expert help with roof flashing repairs or need quality materials, visit Total Roofing Hub for the best roofing products and services.


 KB Construction & Home Improvements5.0 (7 reviews)
 Whalen Exteriors5.0 (55 reviews)
 Jackson Roofing Company Inc4.0 (4 reviews)
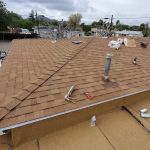 JD Roofing Service5.0 (5 reviews)
 K & M Conner Brothers Contractors, Inc5.0 (4 reviews)
 Bear Creek Property Services5.0 (4 reviews)
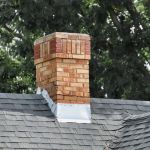 How to Repair Roof Flashing Around Skylights & Vents: A Complete Guide
 How to Protect Your Roof After a Tree Falls On It: Essential Steps
 How Much Does Siding Replacement Cost in Different US States?
 Everything You Need to Know About Roof Warranties – Types, Coverage, and Claims
 How Roof Decking Condition Affects Overall Roofing Cost
 Everything You Need to Know About Roof Warranties