
- 1- Understanding Roof Flashing Around Skylights and Vents
- 2- Common Signs of Damaged Roof Flashing
- 3- How to Repair Roof Flashing Around Skylights & Vents
- 4- Preventative Measures to Avoid Future Damage
- 5- When to Call a Professional for Roof Flashing Repair
1. Understanding Roof Flashing Around Skylights and Vents
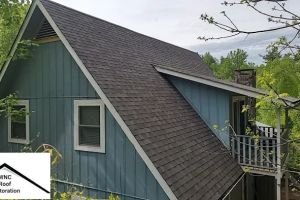
Roof flashing is a vital component of any roofing system, particularly around skylights and vents. It is typically made of metal (such as aluminum or copper) and serves as a barrier to direct water away from areas that are prone to leaks. Skylights and vents are common points of entry for water, and if the flashing around these features isn’t properly installed or maintained, it can lead to serious water damage inside your home.
The primary role of flashing is to prevent water from seeping under the roofing materials, which could result in leaks and water damage. Whether you are dealing with a skylight or a vent, the flashing must be securely attached and intact to ensure it performs its function properly.
Appalachian Roof Restoration LLC
FranklinMacon CountyNorth Carolina
33 Riverview St, Franklin, NC 28734, USA
2. Common Signs of Damaged Roof Flashing
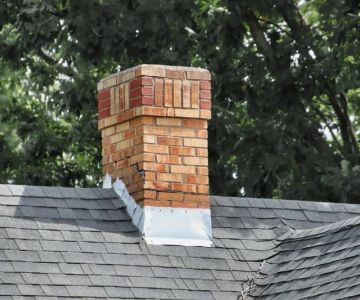
Roof flashing, especially around skylights and vents, is exposed to the elements, so it can suffer wear and tear over time. It’s essential to recognize the signs of flashing damage early to prevent costly repairs later. Here are some common indicators that the flashing around your skylight or vent may need repair:
- Water Stains on Ceiling: One of the most obvious signs of a roof leak is water stains appearing on your ceiling or walls around the skylight or vent. These stains indicate that water is getting in through a compromised flashing system.
- Rust or Corrosion: Over time, metal flashing can corrode, especially in areas exposed to moisture. Rust spots around your skylights or vents are a clear sign that the flashing may need to be replaced or repaired.
- Loose or Bent Flashing: If the flashing appears to be loose, bent, or missing in spots, it may not be effectively keeping water away from vulnerable areas of your roof.
- Visible Gaps: Any visible gaps or cracks in the flashing around skylights or vents are a sure sign that water could potentially seep in, causing long-term damage.
If you notice any of these issues, it’s important to address them as soon as possible to avoid more extensive damage to your roof and home.

Goldstar Handyman Services
MontvilleSoutheastern Connecticut Planning RegionConnecticut
30 Maple Ave, Uncasville, CT 06382, USA
3. How to Repair Roof Flashing Around Skylights & Vents
Repairing roof flashing around skylights and vents requires careful attention to detail to ensure that the flashing is properly sealed and securely in place. Here’s a step-by-step guide on how to repair roof flashing:
- Step 1: Safety First: Always prioritize safety when working on your roof. Ensure that you have a stable ladder, non-slip shoes, and safety gear such as gloves and a helmet. If you're unsure about accessing your roof safely, consider hiring a professional.
- Step 2: Inspect the Flashing: Before you begin repairs, inspect the flashing around the skylight or vent to determine the extent of the damage. Look for any loose pieces, corrosion, or gaps in the seal.
- Step 3: Clean the Area: Remove any debris or dirt around the flashing area. This includes clearing leaves, moss, and old caulk or sealant. Cleaning the surface ensures the new sealant or flashing will adhere properly.
- Step 4: Repair or Replace the Flashing: If the flashing is severely damaged, it may need to be replaced entirely. For minor damage, you can use roofing cement or a silicone sealant to patch up any gaps or cracks. If you're replacing the flashing, remove the old flashing carefully and install the new flashing, making sure it overlaps the roofing material properly.
- Step 5: Seal the Edges: Once the new or repaired flashing is in place, apply a waterproof roofing sealant to the edges. This will create a tight seal and prevent water from infiltrating.
- Step 6: Check for Leaks: After completing the repair, test the area by running water over the roof (using a hose) and checking for leaks inside the home. If you notice any water seepage, reapply the sealant or check for areas that need further attention.
By following these steps, you can repair your roof flashing around skylights and vents effectively, helping to prevent leaks and extend the lifespan of your roof.
4. Preventative Measures to Avoid Future Damage
Preventing future damage to your roof flashing is key to keeping your roof in good condition and avoiding expensive repairs. Here are some preventative measures you can take:
- Regular Inspections: Perform routine inspections of your roof, especially after heavy storms. Look for signs of wear and tear, and ensure the flashing around skylights and vents is intact.
- Maintain Proper Drainage: Ensure that gutters and downspouts are clear of debris to allow for proper water drainage. Blocked gutters can cause water to pool around flashing and increase the risk of leaks.
- Upgrade Flashing Materials: Consider using more durable materials, such as copper or galvanized steel, which are less likely to corrode or degrade over time compared to aluminum flashing.
- Reapply Sealant as Needed: Regularly inspect the sealant around your flashing, and reapply it every few years or as needed to maintain a waterproof seal.
By taking these preventative measures, you can significantly reduce the chances of future flashing issues and keep your roof in great shape for years to come.
5. When to Call a Professional for Roof Flashing Repair
While many homeowners can handle minor flashing repairs themselves, there are instances where it’s best to call a professional roofer. Here are some situations where you should consider hiring an expert:
- Extensive Damage: If the flashing is severely damaged or the leak is widespread, it’s best to leave the repair to professionals who have the expertise and tools to handle larger issues.
- Safety Concerns: If you’re unsure about safely accessing your roof or performing the repair, hiring a professional ensures that the job will be done safely and correctly.
- Warranty Protection: If your roof is still under warranty, it’s important to have a professional handle the repair to avoid voiding the warranty.
Hiring a professional ensures that the flashing repair is done properly and that you won’t face recurring issues down the road.


 KB Construction & Home Improvements5.0 (7 reviews)
 Whalen Exteriors5.0 (55 reviews)
 Jackson Roofing Company Inc4.0 (4 reviews)
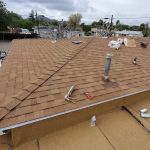 JD Roofing Service5.0 (5 reviews)
 K & M Conner Brothers Contractors, Inc5.0 (4 reviews)
 Bear Creek Property Services5.0 (4 reviews)
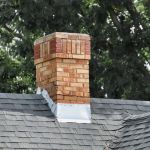 How to Repair Roof Flashing Around Skylights & Vents: A Complete Guide
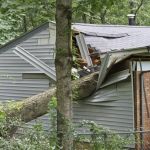 How to Protect Your Roof After a Tree Falls On It: Essential Steps
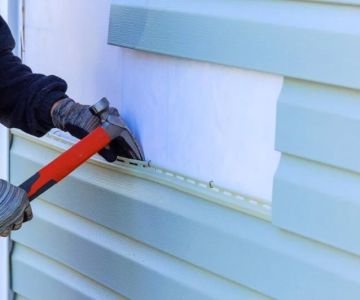
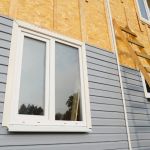 How Much Does Siding Replacement Cost in Different US States?
 Everything You Need to Know About Roof Warranties – Types, Coverage, and Claims
 How Roof Decking Condition Affects Overall Roofing Cost
 Everything You Need to Know About Roof Warranties