
- 1- Introduction
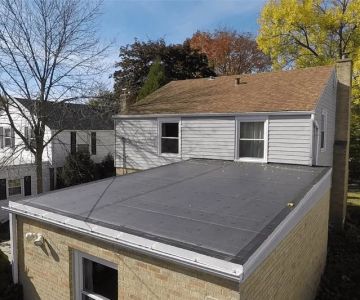
- 2- Importance of Proper Sealing & Caulking
- 3- Materials Needed for Siding Sealing and Caulking
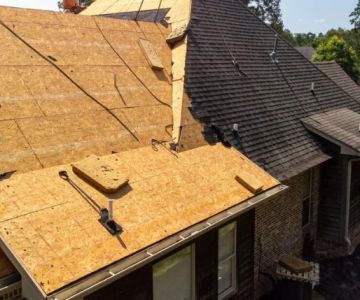
- 4- Step-by-Step Guide to Sealing and Caulking Your Siding
- 5- Common Mistakes to Avoid
- 6- Real-Life Case Studies: Effective Siding Sealing
- 7- Conclusion
1- Introduction
Proper siding sealing and caulking are essential steps in protecting your home from the harsh weather elements. Whether you're preparing your home for winter or looking to maintain your siding year-round, sealing and caulking provide a durable barrier that keeps moisture, drafts, and pests out. In this article, we will discuss the best practices for siding sealing and caulking, ensuring that your home stays secure, energy-efficient, and aesthetically pleasing.
2- Importance of Proper Sealing & Caulking
Sealing and caulking your home's siding offer several crucial benefits:
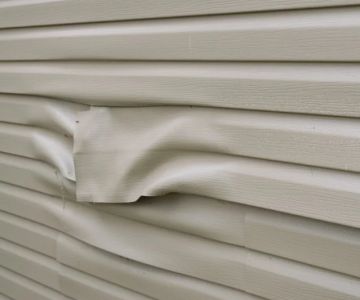
- Prevents Water Damage: Water is one of the leading causes of siding deterioration. Proper sealing ensures that no moisture can seep into cracks and gaps, preventing mold, mildew, and structural damage.
- Improves Energy Efficiency: Gaps and cracks in your siding allow warm air to escape during winter and cool air to escape in the summer, making your home harder to heat or cool. Sealing these areas can reduce energy costs.
- Reduces Pest Infestations: Gaps in your siding provide easy entry points for insects and rodents. Caulking these areas helps keep your home pest-free.
- Enhances Curb Appeal: A properly sealed and caulked siding enhances your home's aesthetic, giving it a polished and well-maintained appearance.
3- Materials Needed for Siding Sealing and Caulking
Before you start sealing and caulking your siding, it’s essential to gather the right materials. Here’s what you'll need:
- Caulk: Choose a high-quality exterior-grade caulk that is specifically designed for siding. Silicone or polyurethane caulk is recommended due to its durability and weather resistance.
- Caulking Gun: A caulking gun is essential for applying the caulk evenly and precisely.
- Putty Knife: A putty knife helps smooth the caulk and ensures an even finish.
- Clean Cloths: Use cloths to wipe away excess caulk and clean the area before applying the new sealant.
- Painter's Tape: This can be used to mask off areas you don’t want caulked, ensuring a neat and professional appearance.
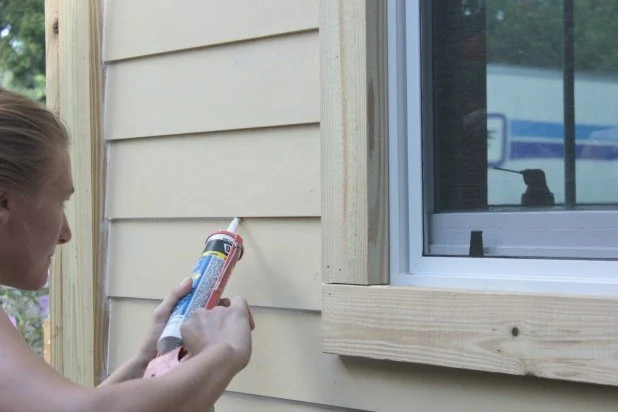
4- Step-by-Step Guide to Sealing and Caulking Your Siding
Follow these steps for effective siding sealing and caulking:
- Inspect the Siding: Begin by inspecting your siding for any gaps, cracks, or areas where the caulk has deteriorated. This can be done visually or with the help of a flashlight for hard-to-see spots.
- Clean the Area: Clean the surface of your siding where you’ll be applying the caulk. Use a mild detergent and water to remove dirt and debris. Allow the area to dry completely before proceeding.
- Apply Painter’s Tape: Use painter's tape to mask off areas you don’t want to caulk, such as windows, doors, or trim.
- Prepare the Caulking Gun: Cut the tip of the caulk tube to the desired size and load it into the caulking gun. Make sure the opening of the tip is wide enough to allow for easy application.
- Apply the Caulk: Starting at one end of the gap or crack, apply a smooth, continuous bead of caulk. Hold the caulking gun at a consistent angle and pressure to ensure an even application.
- Smooth the Caulk: Use a putty knife or your finger to smooth the caulk and press it into the gap. Make sure the caulk is flush with the siding surface.
- Remove the Tape and Clean: After the caulk has been smoothed, carefully remove the painter's tape while the caulk is still wet. Wipe away any excess caulk with a clean cloth.
5- Common Mistakes to Avoid
While sealing and caulking may seem straightforward, there are a few common mistakes to avoid:
- Not Cleaning the Surface: Failing to clean the area before applying caulk can cause poor adhesion and lead to peeling or cracking.
- Applying Caulk in Wet Conditions: Applying caulk when it’s raining or too humid can affect its effectiveness and longevity.
- Overfilling Gaps: While it’s important to fill gaps, overfilling can create an unattractive appearance and can lead to caulk failure over time.
- Using the Wrong Caulk: Not all caulks are made for exterior use. Make sure to choose a product that is weather-resistant and specifically designed for siding applications.
6- Real-Life Case Studies: Effective Siding Sealing
Many homeowners have seen significant improvements in their homes after properly sealing and caulking their siding. For example, one homeowner reported a noticeable drop in energy bills after addressing gaps in their siding with caulk. Another case involved preventing water damage by properly sealing cracks around windows, which kept the interior dry during heavy rains.
These real-life examples highlight the impact that proper sealing and caulking can have on the overall condition and energy efficiency of your home.

7- Conclusion
Proper siding sealing and caulking are essential practices for maintaining the integrity of your home. By following the best practices outlined in this article, you can protect your home from water damage, increase energy efficiency, and improve curb appeal. For the right tools and professional advice on siding repairs, visit Total Roofing Hub, where we offer expert recommendations for all your home improvement needs.


 Above All Roofing Inc5.0 (10 reviews)
 J. Byler Metal Roofing5.0 (19 reviews)
 Ridge Top Exteriors4.0 (163 reviews)
 Crank Brothers Roofing5.0 (7 reviews)
 A.M. Reeder Home Improvements, LLC5.0 (5 reviews)
 ROOFX Roofing5.0 (116 reviews)
 How to Spot Hail Damage on Your Roof - Expert Tips for Homeowners
 Roof Sheathing Replacement: When It Becomes Necessary for Your Home
 The Best Roofing Materials for Cold Climates That Protect Your Home
 How Often Should You Replace Your Home's Siding? Expert Guide for Homeowners
 Roof Re-Roofs or Layovers: Pros, Cons & Codes Explained
 How to Safely Repair Asphalt Shingles After Winter Freeze Damage