
1. Introduction
Roof leaks are one of the most common and frustrating issues homeowners face. Whether it's a small drip or a large, persistent leak, roof damage can quickly lead to serious problems like water damage, mold growth, and structural issues. Understanding the causes of roof leaks and the most effective repair methods is essential for maintaining the integrity of your home. In this article, we will explore different roof leak repair methods, focusing on leaks under shingles, flashing, and sheathing. By the end, you'll have a clearer idea of how to handle these leaks and prevent further damage. For expert advice and roofing products, visit Total Roofing Hub.

2. Identifying the Sources of Roof Leaks
Before you can repair a roof leak, it’s crucial to identify the source of the problem. Roof leaks can occur in several places, including under shingles, around flashing, or within the roof sheathing. Understanding where the leak is coming from will determine the appropriate repair method.

2.1 Leaks Under Shingles
Shingle leaks are often caused by damaged or displaced shingles, improper installation, or wear and tear over time. Water can seep under the shingles and travel along the roof decking, leading to leaks inside the home.
2.2 Leaks Around Flashing
Flashing, which is the metal material used to seal joints and prevent water infiltration, is another common source of roof leaks. Flashing around chimneys, vents, skylights, and valleys is especially prone to damage, either from corrosion or poor installation.
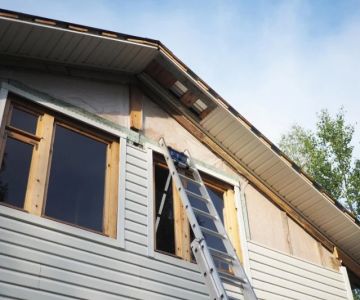
2.3 Leaks in Roof Sheathing
Roof sheathing leaks occur when the wood decking beneath the roofing material becomes damaged or deteriorates. This type of leak often arises when water has been seeping into the roof for an extended period of time, causing the sheathing to rot or warp.
Once the source of the leak is identified, you can proceed with the appropriate repair method.
3. Roof Leak Repair Methods
There are several methods to repair roof leaks, and the right approach depends on the location and extent of the damage. Here are the most common repair methods for addressing roof leaks:
3.1 Inspect and Clean the Area
Before starting any repairs, inspect the damaged area thoroughly. Clean away any debris, such as dirt, leaves, or moss, that may be obstructing the damaged area. This will help you assess the situation more accurately and ensure a proper seal during repairs.
3.2 Replace Damaged Shingles
If the leak is coming from damaged or missing shingles, they will need to be replaced. Carefully remove the damaged shingles, ensuring you don’t damage surrounding shingles, and replace them with new ones that match the existing roof. Be sure to apply roofing nails and sealant around the edges to prevent further leaks.
3.3 Re-seal or Replace Flashing
If the leak is around the flashing, inspect the metal for signs of corrosion or damage. Reseal the flashing with roofing cement if it's only slightly damaged. If the flashing is cracked or bent, it may need to be replaced entirely. This will involve removing the old flashing, applying new flashing, and sealing it securely with roofing cement or sealant.
3.4 Replace or Repair Roof Sheathing
If the leak has penetrated through the shingles and flashing to the sheathing, repairs can be more involved. The damaged sheathing will need to be replaced, which may require removing shingles and flashing to access the wood decking. Depending on the extent of the damage, you may need to replace large sections of the sheathing to ensure the roof’s structural integrity.
4. Repairing Leaks Under Shingles
Leaks under shingles are one of the most common roof problems, often caused by wind, storms, or old age. To repair a leak under shingles, follow these steps:
4.1 Lift the Shingles
Carefully lift the shingles around the affected area using a roofing fork or pry bar. Be gentle to avoid damaging surrounding shingles.
4.2 Inspect the Roof Decking
Check the decking beneath the shingles for any signs of water damage, such as rot or mold. If the decking is compromised, it will need to be replaced. If only the shingles are damaged, proceed with replacement.
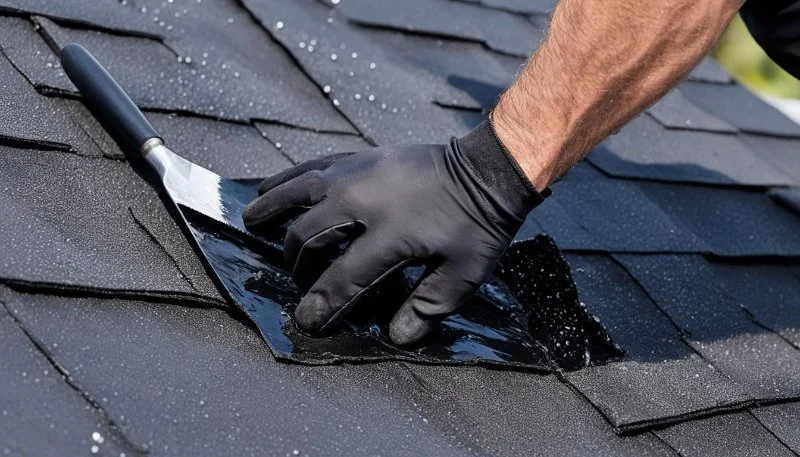
4.3 Apply Roofing Cement
After replacing the damaged shingles, apply roofing cement to the edges to seal the shingles and prevent water from getting underneath again. Ensure the shingles are aligned properly and firmly secured in place.
5. Repairing Roof Flashing Leaks
Flashing leaks typically occur around chimneys, skylights, or vents. Here’s how to repair flashing:
5.1 Inspect Flashing for Damage
Check the flashing for visible signs of damage, such as cracks, holes, or rust. If the flashing is intact but the sealant is damaged, you can reseal it with roofing cement.
5.2 Replace or Reseal Flashing
If the flashing is damaged, remove the old flashing and install new flashing. Make sure to overlap the flashing properly to prevent water from seeping in. Apply roofing cement to seal the edges for added protection.
6. Addressing Leaks in Roof Sheathing
Leaks that reach the sheathing often require more extensive repairs. To address this issue:
6.1 Locate the Source of the Leak
Start by identifying the source of the leak on the roof and removing the shingles and flashing to expose the sheathing. Inspect the sheathing for signs of water damage.
6.2 Replace Damaged Sheathing
If the sheathing is rotted or damaged, replace the affected sections. Cut out the damaged areas and install new sheathing, ensuring it is properly secured and sealed to prevent further leaks.
6.3 Reinstall Shingles and Flashing
After replacing the sheathing, reinstall the shingles and flashing as needed. Ensure all components are securely in place and properly sealed.
7. Case Study: Effective Roof Leak Repair
Consider a homeowner in New Jersey who noticed water stains on their ceiling after a heavy rainstorm. Upon inspection, it was discovered that the flashing around their chimney had become loose, allowing water to seep in. The homeowner hired a professional roofer to replace the damaged flashing and apply a new sealant. After the repair, the roof was properly sealed, and the leaks were completely stopped. This case demonstrates the importance of timely roof repairs and proper maintenance to avoid further damage.
8. Recommendations for Homeowners
To prevent roof leaks from becoming a major issue, consider the following recommendations:
- Regular Inspections: Conduct regular roof inspections to identify potential issues early, especially after storms or extreme weather conditions.
- Proper Maintenance: Maintain your roof by cleaning gutters, removing debris, and checking for damaged shingles or flashing.
- Hire a Professional: If you're not confident in your ability to repair roof leaks yourself, hire a professional roofer to ensure the job is done correctly and safely.
For expert roofing services and high-quality materials, visit Total Roofing Hub. We offer the best solutions to ensure your roof stays in excellent condition for years to come.

 Roofing Prodigy Valley Village4.0 (58 reviews)
 Platinum Roofing5.0 (2 reviews)
 T~n~T Painting and Remodeling5.0 (31 reviews)
 Franks Brothers Construction3.0 (6 reviews)
 Joyce Windows, Sunrooms & Baths - Asheville/Greenville4.0 (190 reviews)
 Da General Contractors5.0 (4 reviews)
 Ultimate Guide on How to Budget for a Roof Replacement Project
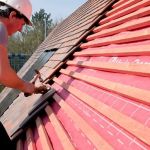 How to Minimize Roof Noise: Material & Installation Tips
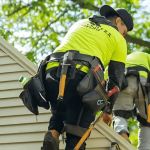 Permit Requirements for Roof & Siding Work in Major US Cities
 Roof Slope & Drainage: How It Prevents Water Pooling Issues
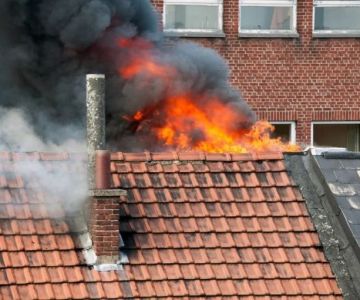
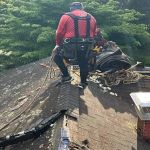 Roof Repair After Fire Damage: What’s Involved
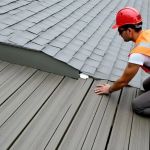 What to Expect During a Roof Inspection: A Homeowner's Guide