
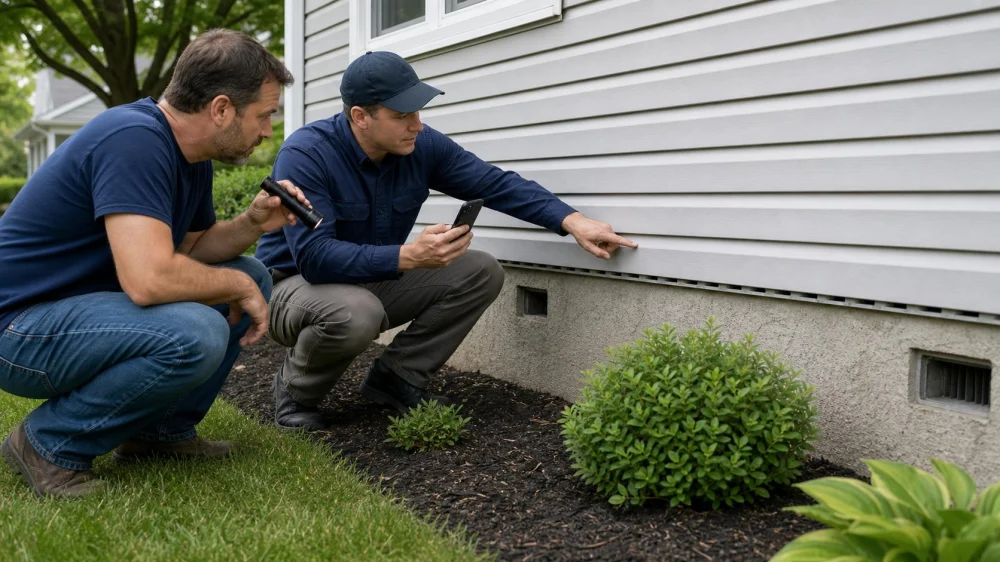
Siding Weep Holes: Why Homeowners Should Not Seal Them
Table of contents
Quick answer
Small openings along some siding edges or accessories may be intentional drainage or ventilation paths. Sealing them with caulk, foam, or tape can trap water behind the cladding and interfere with drying. Do not assume every hole is a weep opening, however. Photograph its location, identify the siding product and installation details, check for interior moisture, and ask the manufacturer or a qualified siding contractor before altering it.
Impriano Roofing & Siding Inc.
Blue BellMontgomery CountyPennsylvania
1662 Dekalb Pike, Blue Bell, PA 19422, USA
What siding drainage openings do
Exterior cladding is not always the building’s only water-control layer. Many wall systems are designed to shed most rain while allowing incidental water behind the siding to drain and the assembly to dry. Openings may appear in vinyl siding profiles, masonry veneer, flashing, trim systems, or specialized rainscreen components. Their size, spacing, and location vary, and some systems use concealed drainage paths rather than obvious holes.

Identify the siding system first
Determine whether the wall uses vinyl, fiber cement, engineered wood, metal, stucco, brick veneer, or a combination. Look for safely accessible product records, invoices, labels on spare pieces, warranty information, and installation manuals. Note nearby windows, doors, roof intersections, decks, meters, and wall penetrations. A gap that is correct for one material may indicate missing sealant, damage, or improper installation in another.
Safe ground-level checks
- Photograph the full wall and each opening from firm, dry ground.
- Note whether openings repeat consistently along a course or accessory.
- Look for dirt trails, staining, swelling, loose pieces, insects, or plant growth.
- Check indoor finishes for stains, peeling paint, odor, or softness without opening walls.
- Record wind direction and rain conditions when moisture appears.
- Do not insert wire, tools, pesticides, foam, or water into an opening.
Why sealing can cause trouble
Caulk or expanding foam can block drainage, bridge movement joints, force water toward vulnerable openings, stain materials, and void a warranty. Tape may hide a pattern without addressing the source. Conversely, leaving a true crack or failed joint open can also permit water entry. The right decision depends on the product’s drainage design, weather-resistive barrier, flashing, clearances, and manufacturer-approved sealant locations.
When to call a professional
Request an inspection for active interior leakage, repeated staining, swollen or soft siding, widespread blocked openings, loose panels, insect entry, missing flashing, or gaps around electrical and plumbing penetrations. Use urgent help if water is near wiring, cladding is falling, structural movement is visible, or storm damage has opened the wall. Ask for findings that distinguish intended openings from defects and identify the drainage path.
Inspection checklist
Prepare wall orientation, siding type and age, product records, dated photos, opening locations, weather during leakage, interior symptoms, prior caulking or painting, nearby roof and gutter conditions, and warranty documents. Ask the contractor to cite the applicable installation detail, examine flashing and the water-resistive layer where appropriate, describe the repair material, and explain how drainage and drying will remain functional.
Limits and safety notes
This general U.S. guidance cannot identify a hole, joint, or drainage feature from appearance alone. Do not climb, remove siding, open electrical fixtures, inject chemicals, or seal unknown openings. Older buildings may contain hazardous materials, and hidden water damage can affect structure and indoor air. Follow product instructions, local building code, warranty requirements, pest-control guidance, and qualified on-site findings.
Evidence notes
A sound assessment links the visible opening to the exact siding profile, accessory, flashing detail, weather-resistive barrier, and manufacturer’s installation instructions. Repeating factory-shaped openings are stronger evidence of intentional design than one irregular gap, but context remains essential. Dated photos during and after rain, interior moisture observations, and written product references support a repair decision without speculative sealing.
Frequently asked questions
Are all small holes at the bottom of siding weep holes?
No. Some are intentional, while others may be damage, installation holes, pest entry, or open joints.
Can I use caulk to stop insects?
Not until the opening is identified. Use a product-approved pest solution that does not block drainage.
Should water ever come from behind siding?
Some systems manage incidental water by drainage, but repeated or heavy flow can justify inspection of the source and flashing.
Can paint block drainage openings?
It can in some systems. Ask the manufacturer or contractor how coatings should be applied and openings maintained.
Does an open weep path mean the wall is waterproof?
No. Wall performance depends on cladding, flashing, water-resistive layers, penetrations, and drainage working together.
Next steps
Do not seal or probe the opening. Photograph its pattern, identify the siding system, find the installation manual, document weather and indoor signs, and schedule an inspection if moisture, damage, pests, or uncertainty persists. Request a written repair detail that preserves the intended drainage and drying path and complies with product and local requirements.




 VEVA Roofing and Construction5.0 (28 reviews)
 Yuras Roofing Company4.0 (145 reviews)
 Restoration Builders of California5.0 (15 reviews)
 Triple Pine Roofing5.0 (112 reviews)
 Lewis Roofing4.0 (450 reviews)
 Shadowcrest Roofing Inc5.0 (24 reviews)
 What’s the Best Time of Year to Replace Your Roof in the U.S.?
 Top 10 Signs Your Roof Needs Immediate Repair: Don't Ignore These Warning Signs
 The Benefits of Professional Roof Cleaning Services for Homeowners
 How to Choose Roof Material Based on Snow Load
 How to Choose a Reliable Roofing Contractor Near You with Confidence
 How to Know If Your Roof Has Poor Ventilation Problems